Monday, May 30, 2016

Black and White Farm Tablescape 2016

I love the month of June.  It is a month that offers so many long-awaited activities.  One of those activities is Breakfast on the Farm during June Dairy Month in Wisconsin where you can tour different farms each year and learn what goes into operating a dairy farm.  Each year the Manitowoc County tour includes a scrumptious breakfast consisting of a ham and egg omelet, sausage, cheese, cinnamon bread and butter, yogurt, doughnut holes, coffee, milk or juice and a yummy ice cream sundae.  All for $7 for adults and $4 for children between the ages of 5-10 and free for children 4 and under.  Other counties in Wisconsin offer tours as well, but some do not include the same delicious menu items. 


This year the 27th Annual Manitowoc County Breakfast on the Farm will be at the Strutz Farm at 7500 Irish Road  in Two Rivers, Wisconsin on June 12, 2016.  The farm established in 1898 is now run by the fifth generation owners and houses 1,050 milking cows and 500 calves. The event will be between 8:00 a.m. and noon.

Such a fun and educational event always inspires me to set a table with a farm related theme.  This year I choose to do my farm tablescape in black and white and with a pop of red.


Remember, if you happen to visit Wisconsin, but just not at this time on June 12th, there is always another Breakfast on the Farm event in some other county throughout Wisconsin.  Just check the listing on the the following website, Dairy Days of Summer.

So come on over to Breakfast on the Farm for Mooo....re of a great time. 


Be sure to stop back again to The Little Yellow Corner Store for the upcoming post on my visit to the lovely historical village of Pinecrest Village.  If you would love to take a step back in time, this is a place to visit. 

Sunday, May 22, 2016

Chocolate Clothespins

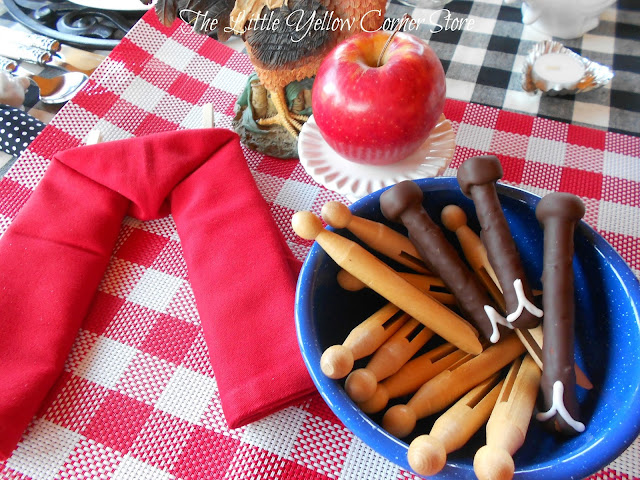
My previous posts, Laundry Line Tablescape and Mini Pants/Breeches Napkin Fold kicked off a frenzy of laundry related searches for items and ideas. I didn't know there was so many interesting things out there regarding the important task of doing the laundry, everything from homemade laundry detergent recipes, proper division of clothes for loads, to some lovely vintage metal wired standing laundry baskets. So to add some interest to this theme and to my Laundry Line tablescape, I decided to make some fun and yummy chocolate "clothespins" for a whimsical treat.


These sweet candies are super fun and make a humorous but welcomed gift for almost any occasion. Here is how you can make them in several easy steps. (The recipe with also a printable version, is given at the end of this post.)

1. Microwave or melt your 10 oz. bag of chocolate chips.


2. Cut the pretzel rods to 3 1/2 inch pieces.


3. Cut the caramel candies in half.


4. Roll the caramel piece between your fingers until it becomes more rounded.


5. Carefully attach the caramel piece to the cut end of the pretzel rod.


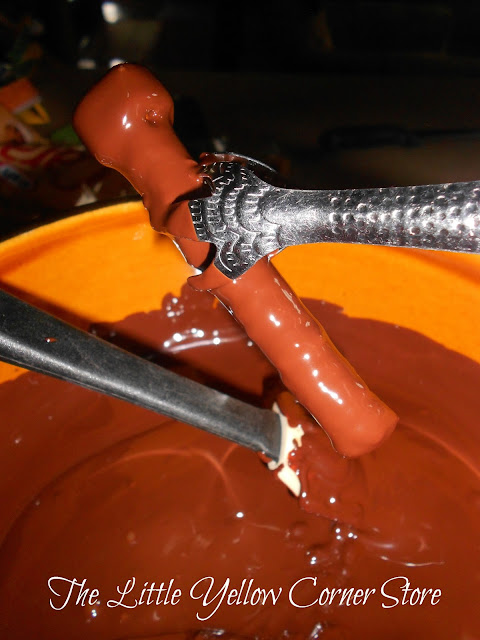
6. Now it is time for dipping. Carefully place the pretzel rod into the melted chocolate covering it completely.


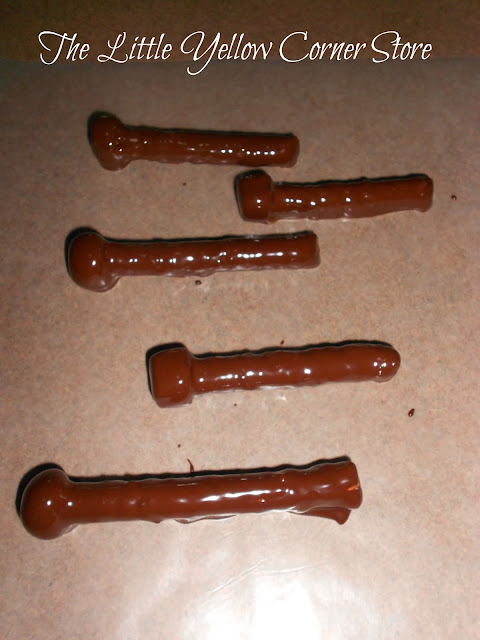
7. Allow the excess chocolate to drip off and let dry or harden on wax paper.


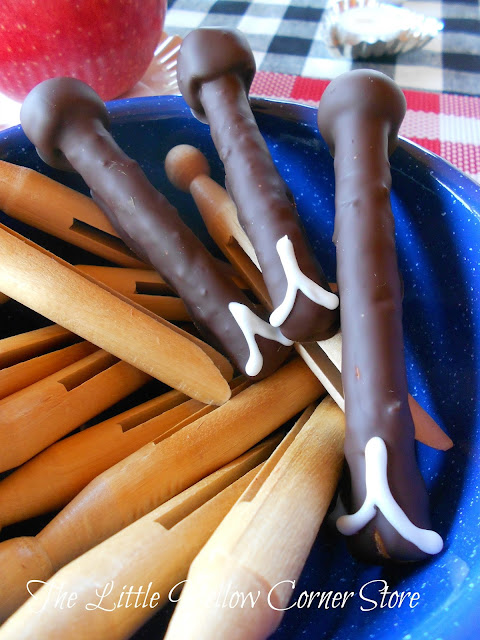
8. When the chocolate is hard, decorate the bottom of the clothespin with an upside down "V" with royal icing to form the split of the clothespin.


Give as a gift in a treat/snack "clothespin" bag sealed with a warmhearted note and a mini clothespin.


For a printable version of this recipe, just click on the picture in the recipe below.

Chocolate Clothespins

1 (10 oz.) bag of Ghirardelli  Chocolate Chips (milk, semi-sweet or bittersweet)
1 bag (12 oz) pretzel rods
1 bag Kraft caramels
Small portion of royal icing for decorating.

Melt chocolate chips in microwave or in fondue pot.  Cut pretzel rods into 3 ½ inch pieces.  Cut caramel squares in half and roll between your fingers to form a ball.  Carefully, squeeze caramel onto cut top of rod.  Dip into melted chocolate and place on wax paper to harden. Using a pastry bag filled with white royal icing, decorate bottom of the clothespin with an upside down “v” to form the split of the clothespin. Let royal icing dry.  Enjoy your “laundry day”.  
DSCN2083.JPG

Saturday, May 14, 2016

Homemade After Dinner Mints

I am happy to share with you the steps on how to make the Homemade After Dinner Mints which I had promised to provide you with in my previous post, Summer Lemonade Tablescape.  You might have noticed that the recipe already appears in my slide presentation embedded into my blog.  Just click on the picture of the mints in the slide and it will take you to a page with a printable recipe.  For convenience, it also appears below too.

So another batch of these easy, melt-in-your-mouth mints will be made.  Using a pastry bag this time, the mints are in the shape of delicate, pink swirls and will be one of other items for a cottage garden themed get well gift.  Also included in the gift tote will be some newly made chocolate caramel covered "clothespins".  The chocolate clothespins were suppose to be included in my previous post, The Laundry Line Tablescape and Mini Breeches Napkin Fold Tutorial for Mother's Day, but I did not have them finished in time.  Therefore, they are shown here as one of the gift items and there will be an upcoming post that will show you how to make these sweet delectable treats.)
   
To make the mints, begin with softening your 4 oz of cream cheese in a bowl.


To your cream cheese, add 2 C powdered sugar.


Add 1/4 tsp. of pure peppermint extract to the cream cheese mixture.


It is optional if you wish to add coloring or not.  I added a few drops of red food coloring.


Mix completely, adding more powdered sugar to keep it from sticking.


Spoon into a small pasty bag and pipe out your design (or roll out the dough and use a small cookie cutter to cut out your design).


Don't forget to let them air dry completely until they are no longer sticky and can be easily handled and packaged. I usually allow them to dry overnight.  They can be frozen and can be enjoyed straight out of the freezer.


Ready to serve.  (But they won't last long.)


Homemade After Dinner Mints

4 ounces plain cream cheese, softened
2 C powdered sugar
¼ tsp. Peppermint extract
3 or 4 drops of food coloring

  1. Blend cream cheese with extract and food coloring until the coloring is mixed through the cheese.
  2. Add powdered sugar and blend until the mixture forms a ball.
  3. Pinch off and roll dough to form a small ball.
  4. Flatten slightly with your palm of your hand and using a small size cookie cutter, punch out the pieces to make a bite size mint.
  5. Allow cut out mints to air dry and become harder.
  6. Arrange nicely in a candy dish for serving to guests.
DSCN1576.JPG

Here is a printable version of the recipe:

Homemade After Dinner Mints

Don't forget to check back for the yummy chocolate clothespin post.

Saturday, May 7, 2016

Mini Pants (or Breeches) Napkin Fold Tutorial

In my opinion this napkin fold is one of the most adorable I have done thus far for my tablesettings.  These mini pants or "breeches" as I call them are perfect for various tablescape themes, such as a summer beach theme or a children's theme.  In my previous post, Life's Simplicity -- A Laundry Line Tablescape,  I used these cute little breeches complete with tiny clothespins for a tablescape which celebrates the nostalgic times of yesteryear's wash day.  If you missed the post, you can view it by clicking here:  Life's Simplicity--A Laundry Line Tablescape.


This post is a tutorial of how to fold this sweet, little napkin.  It is a bit more involved than some folded napkins, but, hopefully, my pictures will make it easier than when I learned to do it.  Lets give it a try.

Once again, pick a square napkin made of stiff fabric that will hold a fold.  I am using a solid color napkin to make the picture of each fold clear and easy to see, but the napkin is even more adorable when there is a print.  For summer, it may be fun to use a bold, floral Hawaiian print napkin which could be surrounded with snap shots of various vacation trips.   Or a white lacy napkin could be used and the bottom of each leg could be tied with a colorful ribbon that could convert them into Victorian bloomers/undergarments.  With a little imagination, it is endless.

So lets get to work.....

Step 1.   Open the napkin so that it lays flat in front of you.


 Step 2.  Fold the napkin in half, folding the bottom edge of the napkin to the top edge of the napkin.


Step 3.  Fold the bottom edge of the napkin to the center.


 Step 4.  Fold the top of the napkin to the center.


Step 5.  Now turn the napkin so that it is vertical.


Step 6.  Fold the napkin in half, folding the bottom edge of the napkin to the top edge.


Step 7.  With the napkin folded in step 6 and turned so the folded edge is at the top, pinch the folded edge in from both sides to form a triangle on the inside and a point on the outside.


Here is a side view too.


 Step 8.  The next several steps are a bit tricky, but, hopefully, the pictures will be helpful.   Now with the point at the top, hold the "point" of the napkin and flip the top layer of the napkin up but not beyond the "triangle" underneath or the area you are holding down.


Step 9.  Now with the top layer flipped up, hold it down while you flip the bottom layer under so the edges of the napkin meet and the many folds, including the "triangle" is showing in the center.


Step 10.  While holding everything in place, carefully fold open one side of the napkin so that the right side is folded over to the left side of the napkin. (Like turning a page of a book. Hopefully, the picture will help with this step.)  Do the other side of the pants too.


Below is a picture of one side of the top of the napkin which now shows the new sides brought together and the triangle fold sandwiched in between.


Step 11.  You should now see the completed pants.  Make any small adjustments but be sure to keep the folds intact.  Add some mini clothes pins or any other embellishments and place it on your table.  Your mini pants/breeches are finished!


Or for those of us who remember bell bottom pants......


You bet your breeches this napkin fold is fun! 
 Happy folding!